

The idea is to be able to tell when a button is pushed and when it is released with minimal "bouncing". Bouncing occurs because the timing is so fast, the even though you think the switch closed once, it actually open and closes many times per micro-second before it settles down. The circuitry here help eliminate the continual open and closing, and just lets the first close signal in. Then the signal is sent to the controller, and then to the program to tell the program to move in some form or another. If you have questions, please ask.
Until next time, keep watching.
______________________________________________________________________________
This post is what I call a One-Shot-Oscillator. I was looking for a way to emulate a "fire" button for the arcade game. I needed something that would reset it's self after a predetermined duration, now matter how long the player held down the button. I found a lot of schematics for what that call a "One Shot Multivariator". That is a fancy name to describe a circuit that creates a predetermined pulse length, but it does not oscillate to actually create a certain sound at a certain frequency.
I then found a pretty cool and easy 555 timer oscillator that will give you the certain sound, but will not automatically shut off. So I thought to myself, "Self, what if I put the output of the Multivibrator circuit into the voltage of the oscillator circuit." So, Ta-Daaaa........ here it is, my hybrid circuit:

Now you can select the R1 and C1 for the pulse duration and adjust the frequency with C3 and R5.
The Pulse width calculation can be derived by the formula f= 1/2pi * sqrt LC. The frequency can be determined by f=1/0.69 * C3 *(R6+2R5). If you need further explanation, email me and let me know. I'll be glad to help in your design.
___________________________________________________________________________
If you have seen my stepper motor controller card in the hardware portion of the Robot Recipe, I have redesigned it for surface mount devices (SMD). The SMD's are smaller than the Dual Inline Pin (DIP) configuration, so I was able to cram two circuits on one plate. This is handy so that if you have these sent off to be done, you get two for one. Here it is:
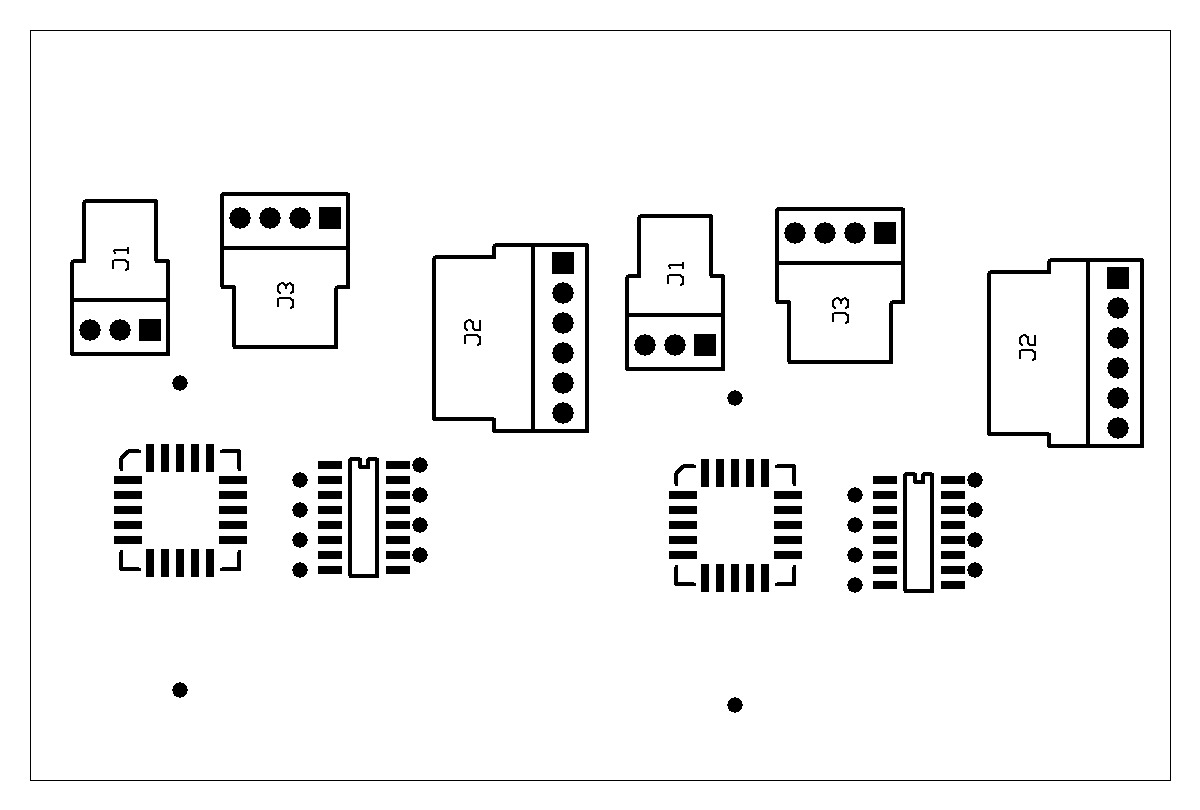
======================================================================
Being unemployed has some benefits. It affords me the time to attack some of my projects in full force. Downside is not being able to afford parts when you need them. It's a good thing I'm a scrounge. We, Jime and I, were given a project on creating an automated cd copier and stuffer to allow businesses to do their mass marketing mailings, or in the Community Computer Center's case in Roseburg, OR, to send out copies of the latest versions of Ubuntu, or other popular freeware on their customers request. Jim has the job of designing and developing the automated / robotic cd burner, and I have the job of designing and creating the CD Stuffer after Jim's robot burns them. I have the first stage prototype almost done and wanted to share it with you. Here are the pics and I will try to explain as I go.

Here is the crude prototype consisting of a switch, drive motor, controller board (which is custom designed and built) a conveyor system and a trap exit door.


The CD is inserted part way into the sleeve via the conveyor system.

The trap door drops the CD the rest of the way into the sleeve and onto the second stage, the conveyor of the mailer stuffer, yet to be designed and built.
I hope you enjoyed this and will keep you posted on this progress.